20February
PurelyPope Wedding: Save the Dates
Our Save the Dates are out and about, guys!!! I’m soo happy that we got these out and now our guests can start getting excited for our big day. I wanted our save the dates to be fun, give a glimpse of the wedding vibe and show off our wedding website too. Without further ado, let’s dive into the details…
Save the Dates: The Specifics
- The Idea
- Of course I trolled Pinterest for HOURS looking for save the dates ideas, but I wanted ours to show our personality and give a little glimpse of the wedding. You can see all of the ideas I pinned on this board. This also gives you a peek into the vibe I’m thinking for the real deal invites, too!


- The Execution
- Once I had my idea in my head, I did what I always do and I went to my brother to design it. If you’re looking for a custom design, I would recommend looking for an artist on Fiverr, which is a site that allows you to source your designer based on what you’re looking for.


- The Goods & Details
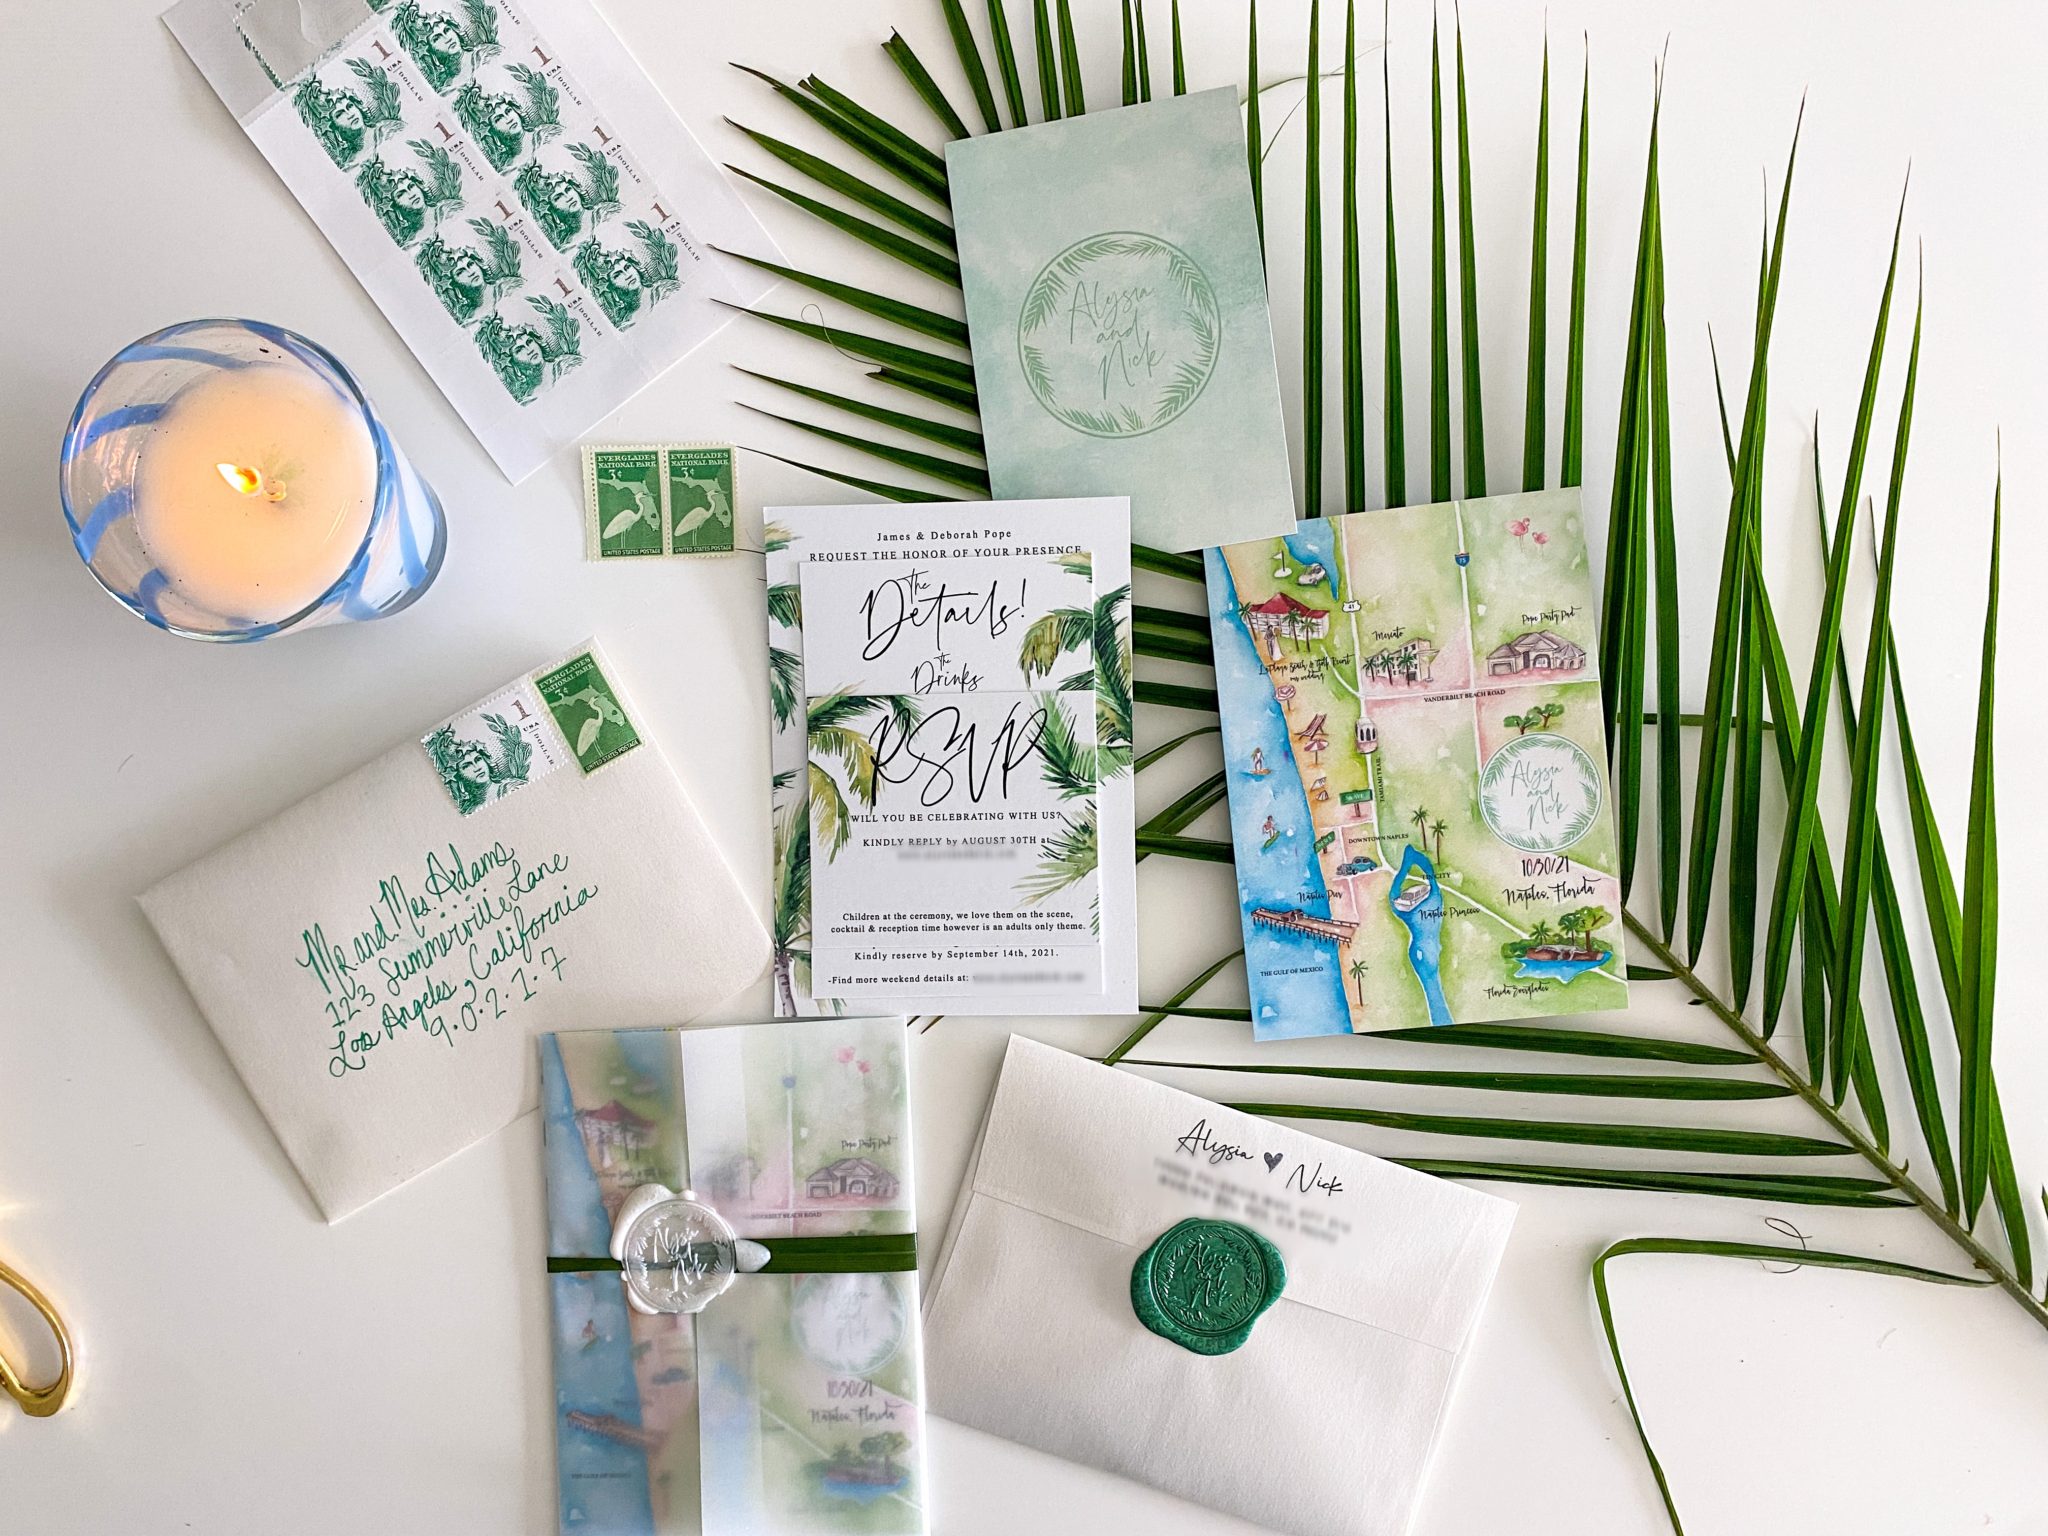
- Envelopes: We ordered these ‘pastel green’ envelopes in bulk – we got about 50 extra which you’ll need, especially if you’re handwriting to makeup for any mistakes!
- Stamps: Unfortunately the USPS doesn’t do custom stamps anymore, but I still wanted them to match my aesthetic. You can also look into vintage forever stamps (which I may do for the invites), but these were perfect for the save the dates! I got these $1 stamps so that it would cover the invite in full!
- Magnet: My brother ordered these for us through a trade printer (if you use a graphic designer they will be able to do this for you.) We stuck them on the cards with these adhesive dots.
- Card: Again, these were ordered through a trade printer, you can have a designer order for you!
- Return Address Stamp: I ordered this on Etsy, and this is where I ordered it from. Be sure to stamp these before the envelopes are stuffed so that
- Custom Wax Seal & Wax: We ordered a custom wax seal stamp of our logo (my brother designed this), which I ordered on Etsy. I then got the wax off of amazon – and I went with a pearl white!
- Pens: I used these white gel pens to address the envelopes. I did it myself, and took inspiration from google – I looked at a lot of invites and calligraphy script while I was addressing!